To set up XUI Panel for you, here’s the step-by-step process for installation:
Prerequisites
- Ensure Ubuntu 20.04+ is installed on your server.
- Install MariaDB 10.5.x (if it’s not already installed):
- Run the following commands to install MariaDB 10.5: bashCopyEdit
sudo apt update sudo apt-get install software-properties-common dirmngr -y sudo apt-key adv --fetch-keys 'https://mariadb.org/mariadb_release_signing_key.asc' sudo add-apt-repository 'deb [arch=amd64,arm64,ppc64el] http://mirror.lstn.net/mariadb/repo/10.5/ubuntu focal main' sudo apt-get install mariadb-server=1:10.5.27+maria~ubu2004 mariadb-client=1:10.5.27+maria~ubu2004 sudo apt-mark hold maria*
- Run the following commands to install MariaDB 10.5: bashCopyEdit
- Update your packages: bashCopyEdit
sudo apt update sudo apt upgrade -y
Step 1: Install XUI Panel
You can choose to install a specific version of the XUI panel. For example:
- For version 1.5.5 Official: bashCopyEdit
wget "https://update.xui.one/XUI_1.5.5.zip" -O /tmp/XUI_1.5.5.zip cd /tmp apt install zip unzip -y unzip XUI_1.5.5.zip ./install - For version 1.5.12 Beta: bashCopyEdit
wget "https://update.xui.one/XUI_1.5.12.zip" -O /tmp/XUI_1.5.12.zip cd /tmp apt install zip unzip -y unzip XUI_1.5.12.zip ./install - For version 1.5.13 (New): bashCopyEdit
wget "https://update.xui.one/XUI_1.5.13.zip" -O /tmp/XUI_1.5.13.zip cd /tmp apt install zip unzip -y unzip XUI_1.5.13.zip ./install
Step 2: License Key and Admin Setup
After installing XUI Panel, it will ask for the license key. Once you enter it, you’ll be redirected to create an admin user.
Step 3: Connect Load Balancers
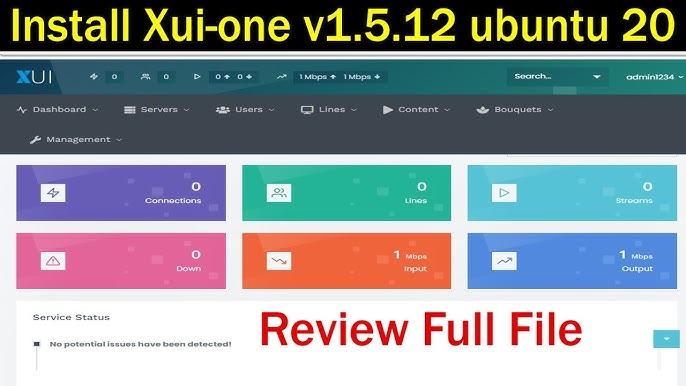
Once the installation is complete, the panel is accessible via a URL (e.g., http://your-server-ip:port). From here, you can easily add load balancers.
Step 4: Update XUI Panel
To update your XUI Panel:
- Update to 1.5.5 Official: bashCopyEdit
wget "https://update.xui.one/XUI_1.5.5_UPDATE.zip" -O /tmp/XUI_1.5.5_UPDATE.zip cd /tmp unzip XUI_1.5.5_UPDATE.zip ./update - Update to 1.5.12 Beta: bashCopyEdit
wget "https://update.xui.one/XUI_1.5.12_UPDATE.zip" -O /tmp/XUI_1.5.12_UPDATE.zip cd /tmp unzip XUI_1.5.12_UPDATE.zip ./update
Step 5: Additional Configuration and Management
- Start XUI Panel: bashCopyEdit
/home/xui/service start - Stop XUI Panel: bashCopyEdit
/home/xui/service stop - Create a Quick Backup: bashCopyEdit
mysqldump -u root xui > xuiLT-backup.sql - Restore Backup: bashCopyEdit
mysql -u root xui < path/backup/file.sql
Troubleshooting and Migration
If you face issues during migration or other processes, you can restore a blank database and start over:
bashCopyEditmysql xui < /home/xui/bin/install/database.sql
For migration, you can either do it via the panel or through shell commands:
- Start migration on the panel: Visit the migration URL:
http://your-server-ip:port/accesscode/setup - Start migration on shell: bashCopyEdit
/home/xui/bin/php/bin/php /home/xui/includes/cli/migrate.php
Reset Admin User
In case you need to reset the admin user and password:
bashCopyEditmysql
USE `xui`;
REPLACE INTO `users`(`id`, `username`, `password`, `member_group_id`, `status`, `owner_id`, `date_registered`)
VALUES(1, 'admin', '$6$rounds=20000$xui$eQfRsD2gsIUhoY5RnnYN82qiB5VeZTcHICQrFxXpa98J2R1454b6lzVHVjiJ.NP0gi0X3K7NXVgxeR1VhVhg61', 1, 1, 0, UNIX_TIMESTAMP());
Let me know if you’d like further guidance or assistance with any of these steps!
This should guide you in efficiently managing the XUI.ONE panel installation, migration, and cleanup tasks for Xtream UI/StreamCreed. Let me know if you’d like further assistance!
Got it! If you need anything regarding XUI or paid services, feel free to reach out via Telegram @NNeamati. Let me know if you need help with anything else!