[ad_1]
ownCloud
is an open-source, self-hosted cloud platform for managing and sharing files. It can be used as an alternative to Dropbox, Microsoft OneDrive, and Google Drive. ownCloud is extensible via apps and has desktop and mobile clients for all major platforms.
This tutorial explains how to install and configure ownCloud with Apache on CentOS 8.
Prerequisites #
Before continuing with the steps below, please ensure that the following prerequisites are met:
Creating Database #
ownCloud supports SQLite, Oracle 12g, PostgreSQL 9
, MariaDB and MySQL
. We will use MariaDB as a database back-end.
Login in to the MariaDB shell by typing:
sudo mysqlRun the following SQL statement to create a new database
:
CREATE DATABASE owncloud CHARACTER SET utf8mb4 COLLATE utf8mb4_general_ci;Create a new database user and grant access
to the database:
GRANT ALL ON owncloud.* TO 'ownclouduser'@'localhost' IDENTIFIED BY 'change-with-strong-password';Once done, exit the MariaDB console by typing:
EXIT;Installing Apache and PHP Modules #
ownCloud is a PHP application. CentOS 8 ships with PHP 7.2, which is supported by ownCloud, but their official documentation recommends PHP 7.3.
Run the following command to install all required PHP extensions:
sudo dnf install php php-curl php-gd php-intl php-json php-ldap php-mbstring php-mysqlnd php-xml php-zip php-opcache Load the new modules by restarting the FPM service:
sudo systemctl restart php-fpmDownloading ownCloud #
At the time of writing this article, the latest stable version of ownCloud is version 10.3.2. Before continuing with the next step, visit the ownCloud download page
and check if there is a new version of ownCloud available.
Use the following wget command
to download the ownCloud zip archive:
wget https://download.owncloud.org/community/owncloud-10.3.2.tar.bz2 -P /tmpOnce the download is complete, extract the archive
to the /var/www directory:
sudo tar jxf /tmp/owncloud-10.3.2.tar.bz2 -C /var/wwwSet the correct ownership
so that the Apache webserver can have full access to the ownCloud’s files and directories.
sudo chown -R apache: /var/www/owncloud
If SELinux is running
on your system, you’ll need to update the SELinux security context:
sudo chcon -Rt httpd_sys_rw_content_t /var/www/owncloudConfiguring Apache #
Open your text editor and create the following Apache configuration file.
sudo nano /etc/httpd/conf.d/owncloud.conf/etc/httpd/conf.d/owncloud.conf
Alias /owncloud "/var/www/owncloud/"

<Directory /var/www/owncloud/>
  Options +FollowSymlinks
  AllowOverride All

 <IfModule mod_dav.c>
  Dav off
 </IfModule>

 SetEnv HOME /var/www/owncloud
 SetEnv HTTP_HOME /var/www/owncloud

</Directory>
Restart the Apache service
to activate the changes:
sudo systemctl restart httpdInstalling ownCloud #
Now that ownCloud is downloaded, and the services are configured, open your browser and start the ownCloud installation by visiting your server’s domain name or IP address followed by /owncloud :
https://domain_name_or_ip_address/owncloud
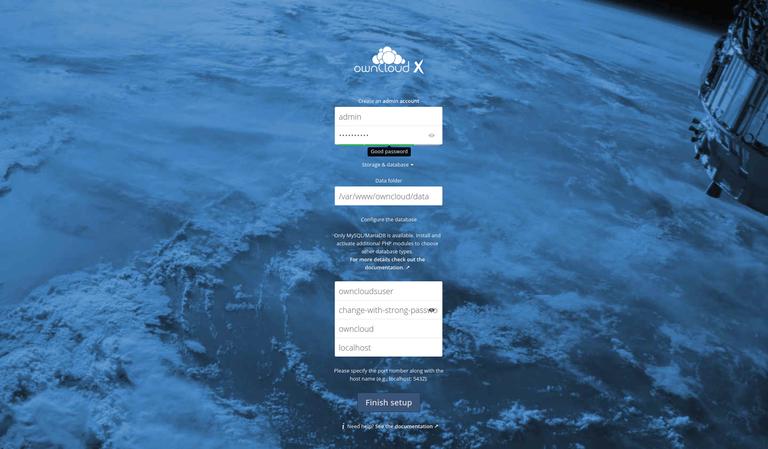
You will be presented with the ownCloud setup page.
If you can’t access the page, then probably your firewall
is blocking port 80 or 443.
Use the following commands to open the necessary port:
sudo firewall-cmd --zone=public --add-port=80/tcpsudo firewall-cmd --zone=public --add-port=443/tcpsudo firewall-cmd --runtime-to-permanent
Enter your desired admin username and password and the MySQL user and database details you previously created.
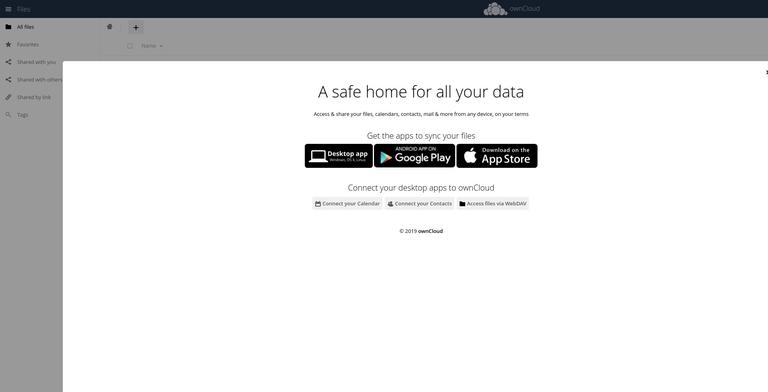
Click on the Finish setup button. Once the installation process is completed, you will be redirected to the ownCloud dashboard logged in as admin user.
Conclusion #
You have learned how to install and configure ownCloud on your CentOS 8 machine. If you have a domain name associated with your ownCloud server, you should secure your Apache with a free Let’s Encrypt
SSL certificate.
To find more information about how to manage your ownCloud instance, visit the ownCloud documentation
page.
If you have any questions, please leave a comment below.
[ad_2]
Source link